THINGS TO SEE AND DO: SORELL STRAWBERRY FARM

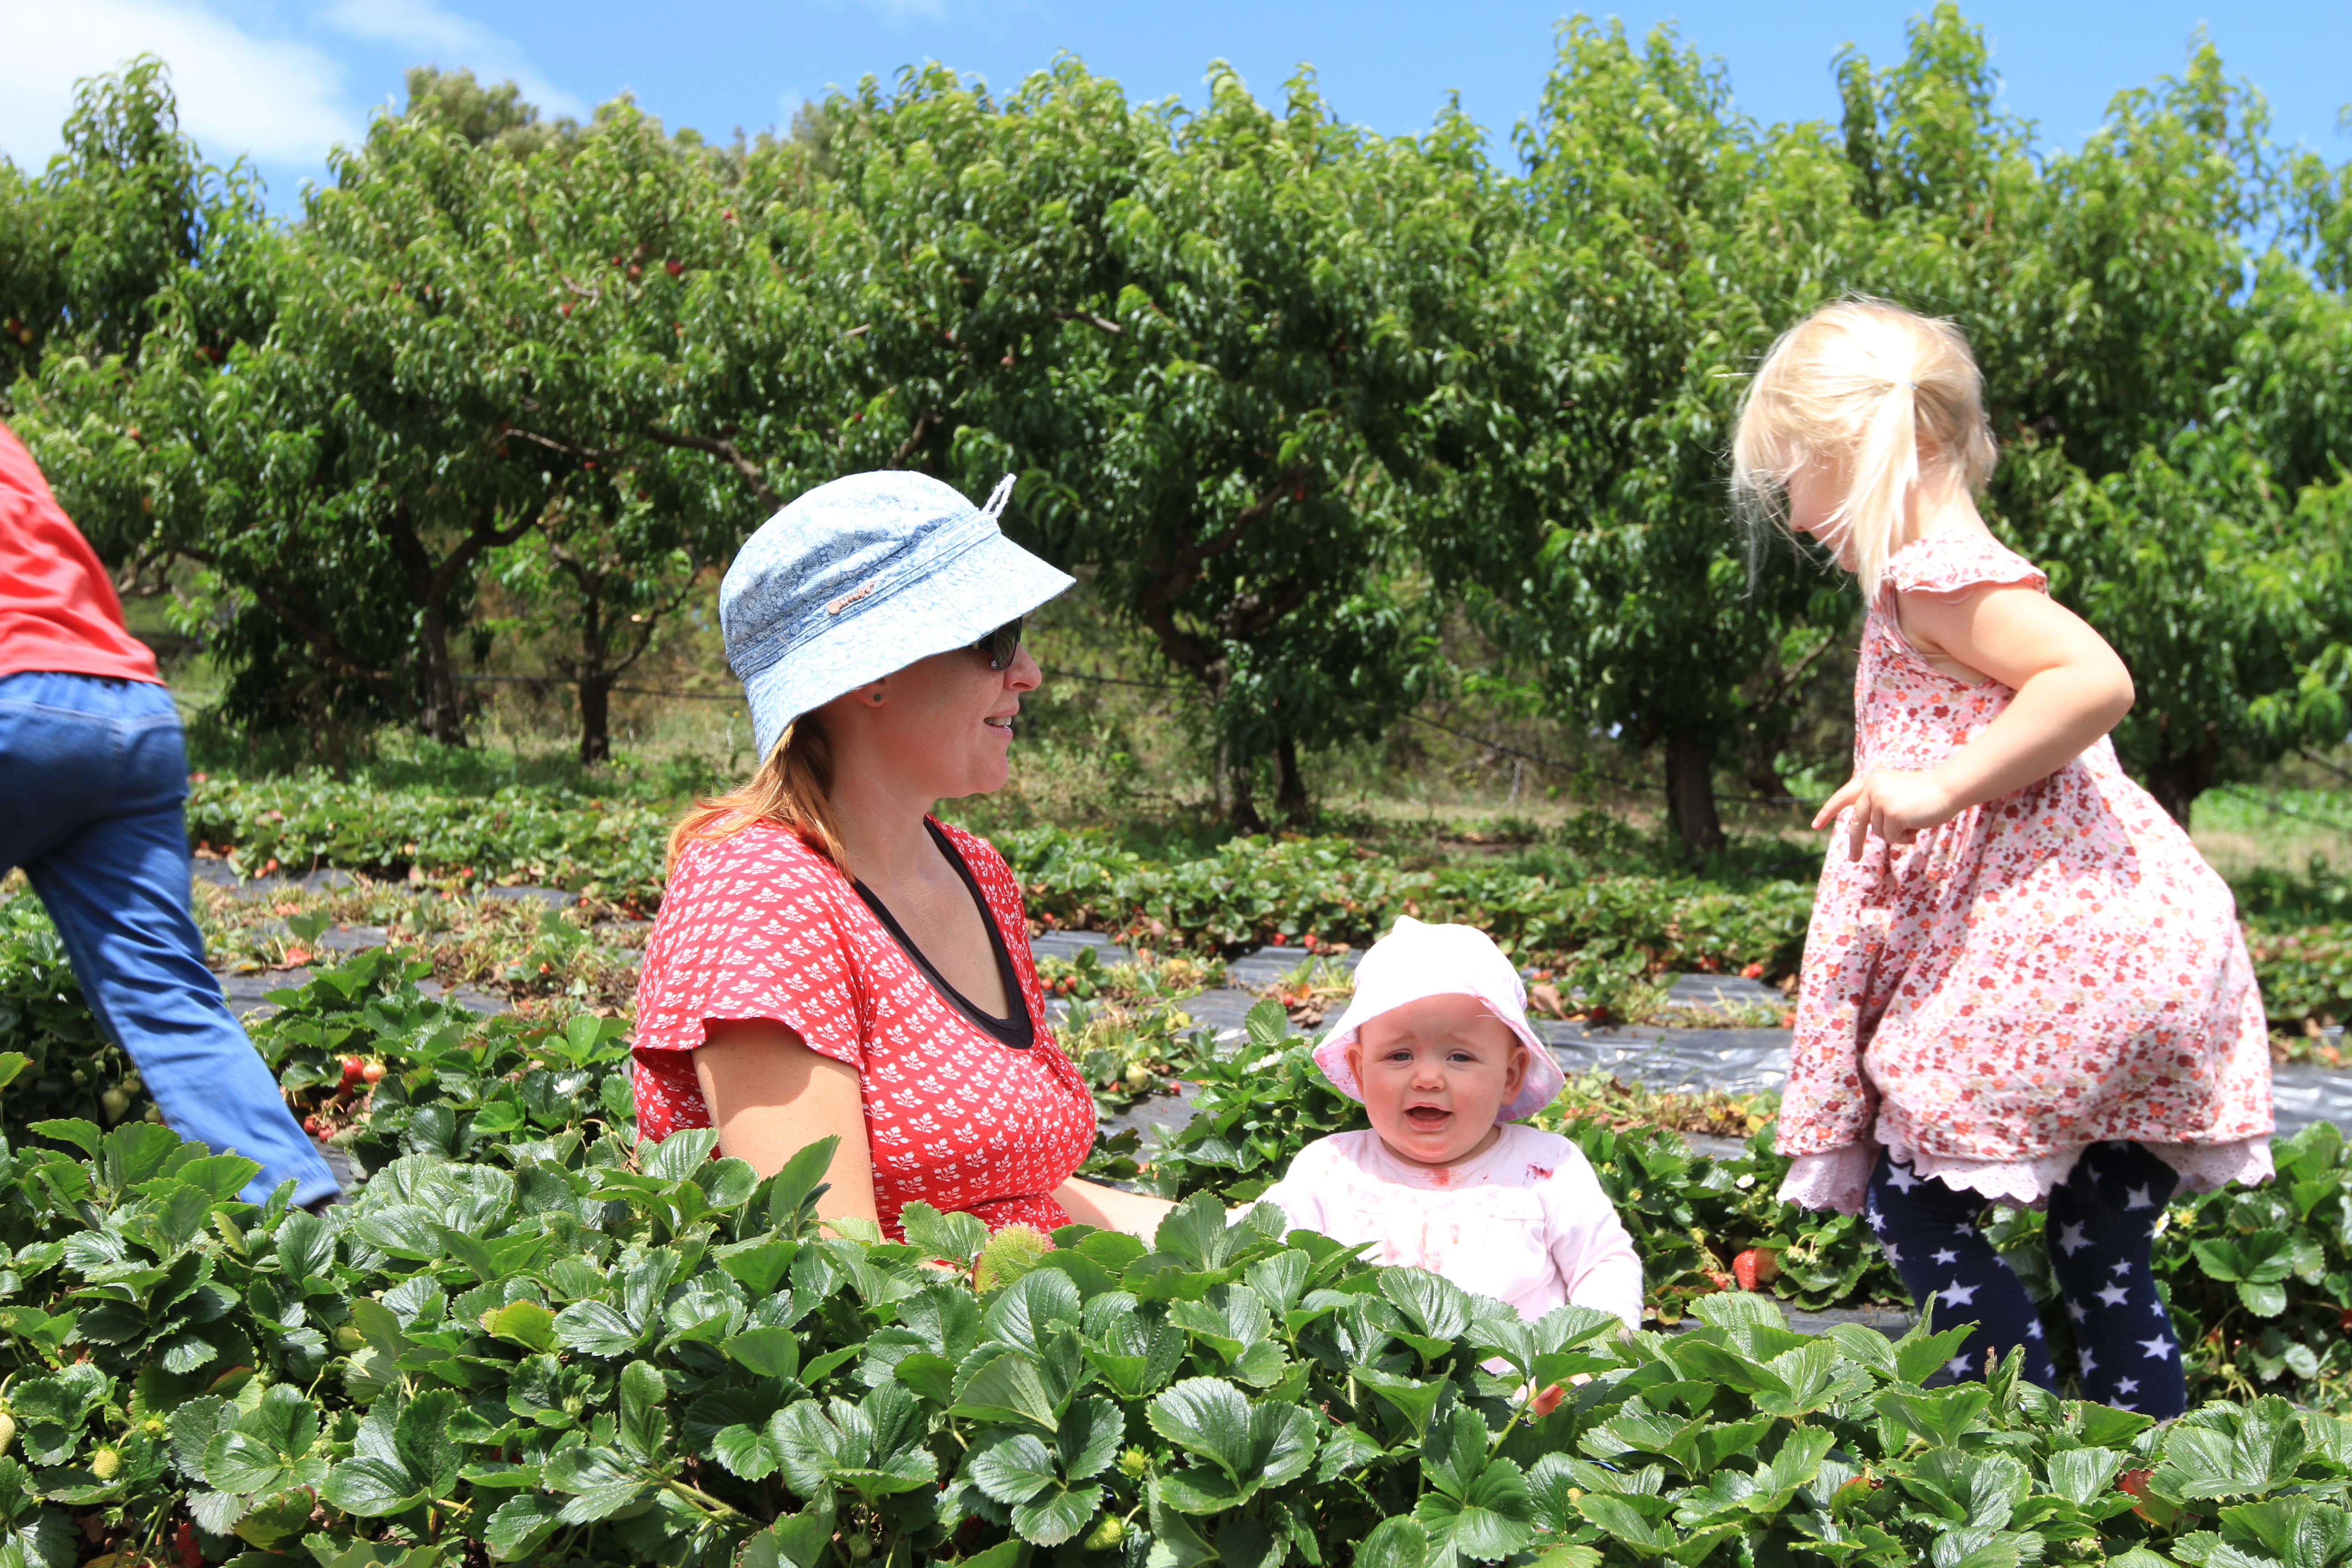
A Sumptuous day of picking strawberries in the sunshine, who wouldn’t enjoy that!?

IMG_3633

Somewhere along the line we (collectively) stopped producing our own food in favour of supermarkets. While many families (ourselves included) are bringing back a bit of token home grown produce to the table, the true art of gardening for sustenance is not as common as it once was.

As a result, a growing trend in teaching kids about the process of ‘paddock to plate’ is emerging as an essential learning area to cover in the early years. This is a concept we will re-visit regularly throughout the year… And strawberry picking surely has to be one of the tastiest and most enjoyable ways to get started!

IMG_3745

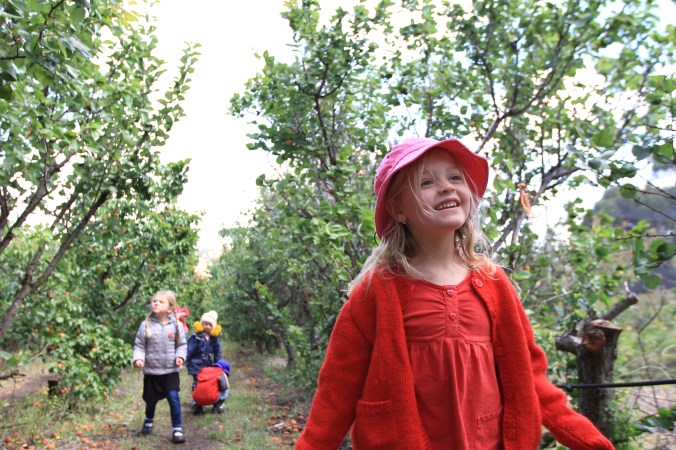
Just past Sorell, this fruit farm was perhaps the children’s favourite experience yet. We met at tthe entrance, paid our entrance fee, and then were let loose to pick as much as we desired (provided that we didn’t leave with more than our container full – eating as much as you can on the farm is entirely encouraged.)

The costs are:

$13.50 per adult

$6.00 per child (3yo and under free)

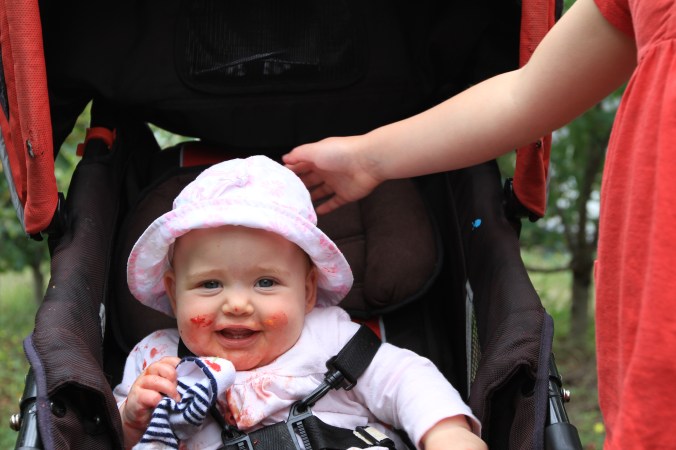
By the time we left I had no doubt that we had well and truly got our money worth. We were at the farm for about 5 hours, exploring the different fruits at various states of growth, picked continually, filled our containers and our bellies with an array of fruits and all 5 kids were fully engaged throughout process.

IMG_3652

So while we left with a tub of berries each, we achieved far more than the acquisition of fruit:

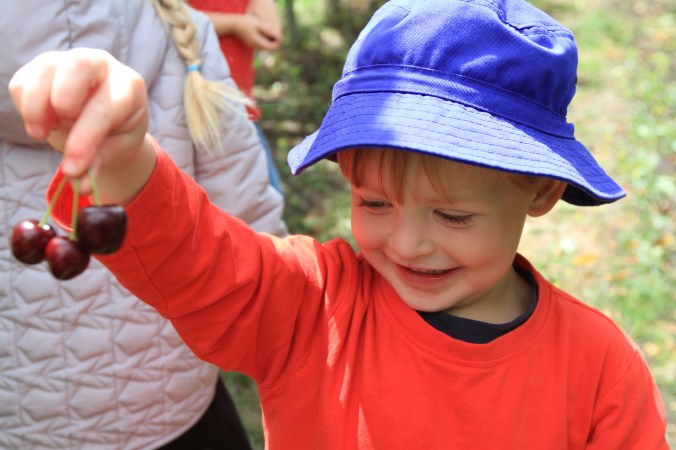
  • We expanded our berry tasting pallet (even the pickiest eater was willing to try each new fruit that we came across while in this environment, and she found a new berry that is her favourite food now!)
  • We ran, laughed, jumped through the rows (with fairly good sight lines the kids had a little more freedom to explore independently while we could still see them easily). For young children the responsibilities to explore freely with friends are few and far between!IMG_3679
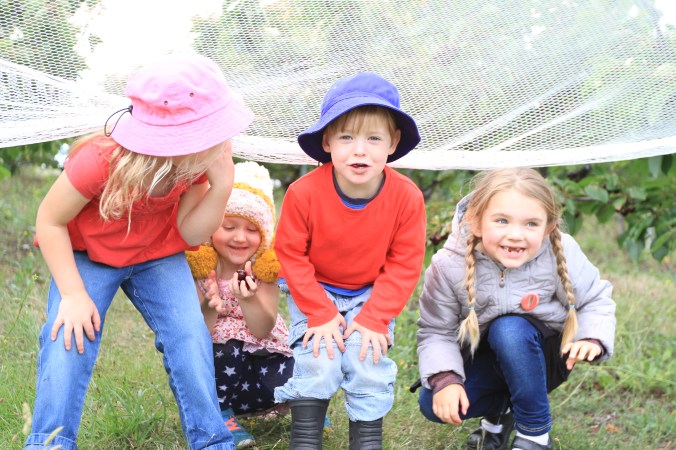
  • We searched, spotted, assessed for ripeness, plucked and tasted each fruit. The day was like a giant tasty tactile game of hide and seek, even the youngest member was delighted with this sensory rich experience.

IMG_3719

  • The kids asked lots of questions and we all expanded our technical fruit knowledge. (The different kinds of bushes that different fruits grow on, what shows us it is ripe for different fruits, what season each fruit ripens etc.) The kids (having seen corn and apples in the field near the berries) can’t wait to return in Autumn for another harvest experience.

IMG_3689

As always, learning is re-enforced by re-telling and/or acting out what has been learnt. The story telling process fires up and connects those exact same neurons almost as effectively as the actual experience itself. I’m delighted that the ‘harvesting’ has continued after we returned from the farm. We have even been treated to a ‘harvest festival’ entirely planned by the children. (With a selection of fruit, herbs (and weeds!!) that they picked from the garden – a good opportunity to hi-light that not all plants are good to eat!

With strawberry season coming to an end, get yourself out to Sorell Fruit Farm for a delightful day of exploration and learning. There are good facilities (toilets, a little shop and even a cafe) it is easy to find, open 7 days, and we highly recommend the experience!

EASY ACTIVITIES TO BUILD YOUNG BRAINS: MEASURE OUR GALAXY.

IMG_3055 Now, you’ve made a solar system – let’s get some idea of how vast that solar system is… for this you will need a wide-open space and some skewers. Initially we printed little planets for colouring. (Alternatively you could bring the solar system that you just made, but with a little wind in the air we thought it safer to opt for the smaller representation of each planet!) Attach each planet to a skewer with tape and head to a wide open space (we went to the local sports field). Place your sun in the centre of the field and begin to measure your planets. For accurate measurements of the distances between planets you can look here. We chose to be more approximate in our own measurements, with ‘kids steps’ as our form of measurement, and the furthest being 30 steps from our sun (to allow for shorter counting attention span of the 3yo!) IMG_3042 
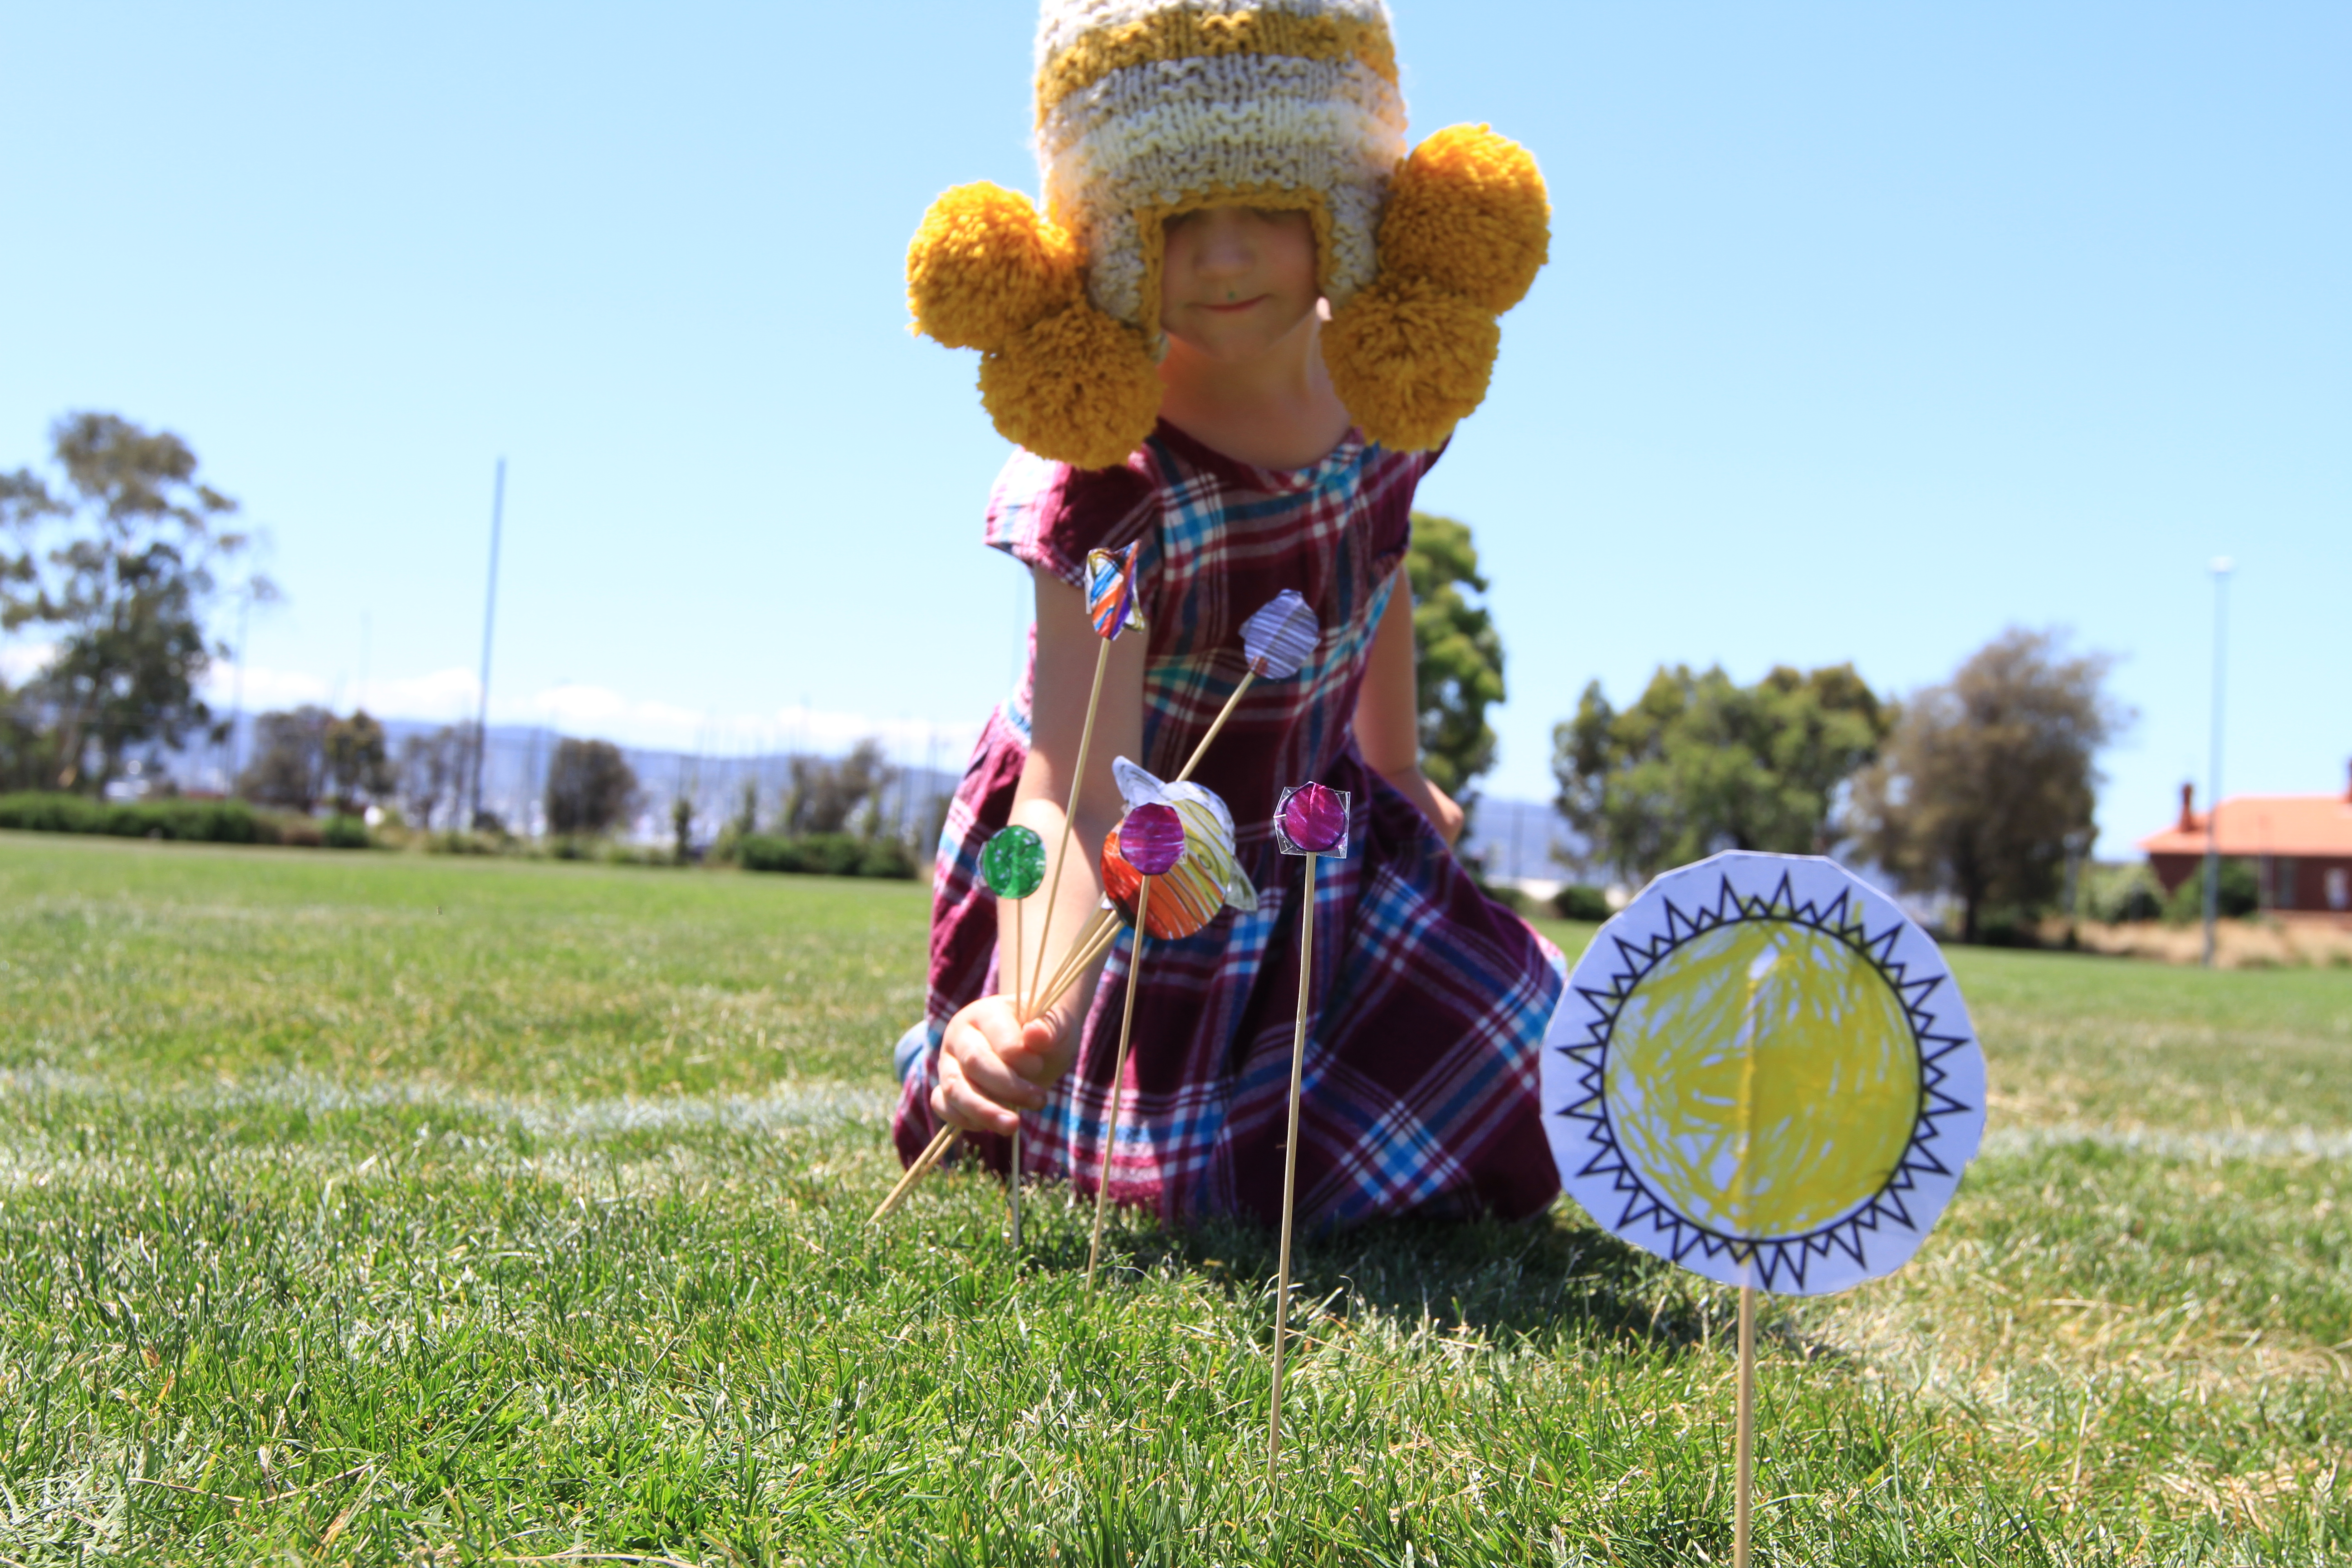
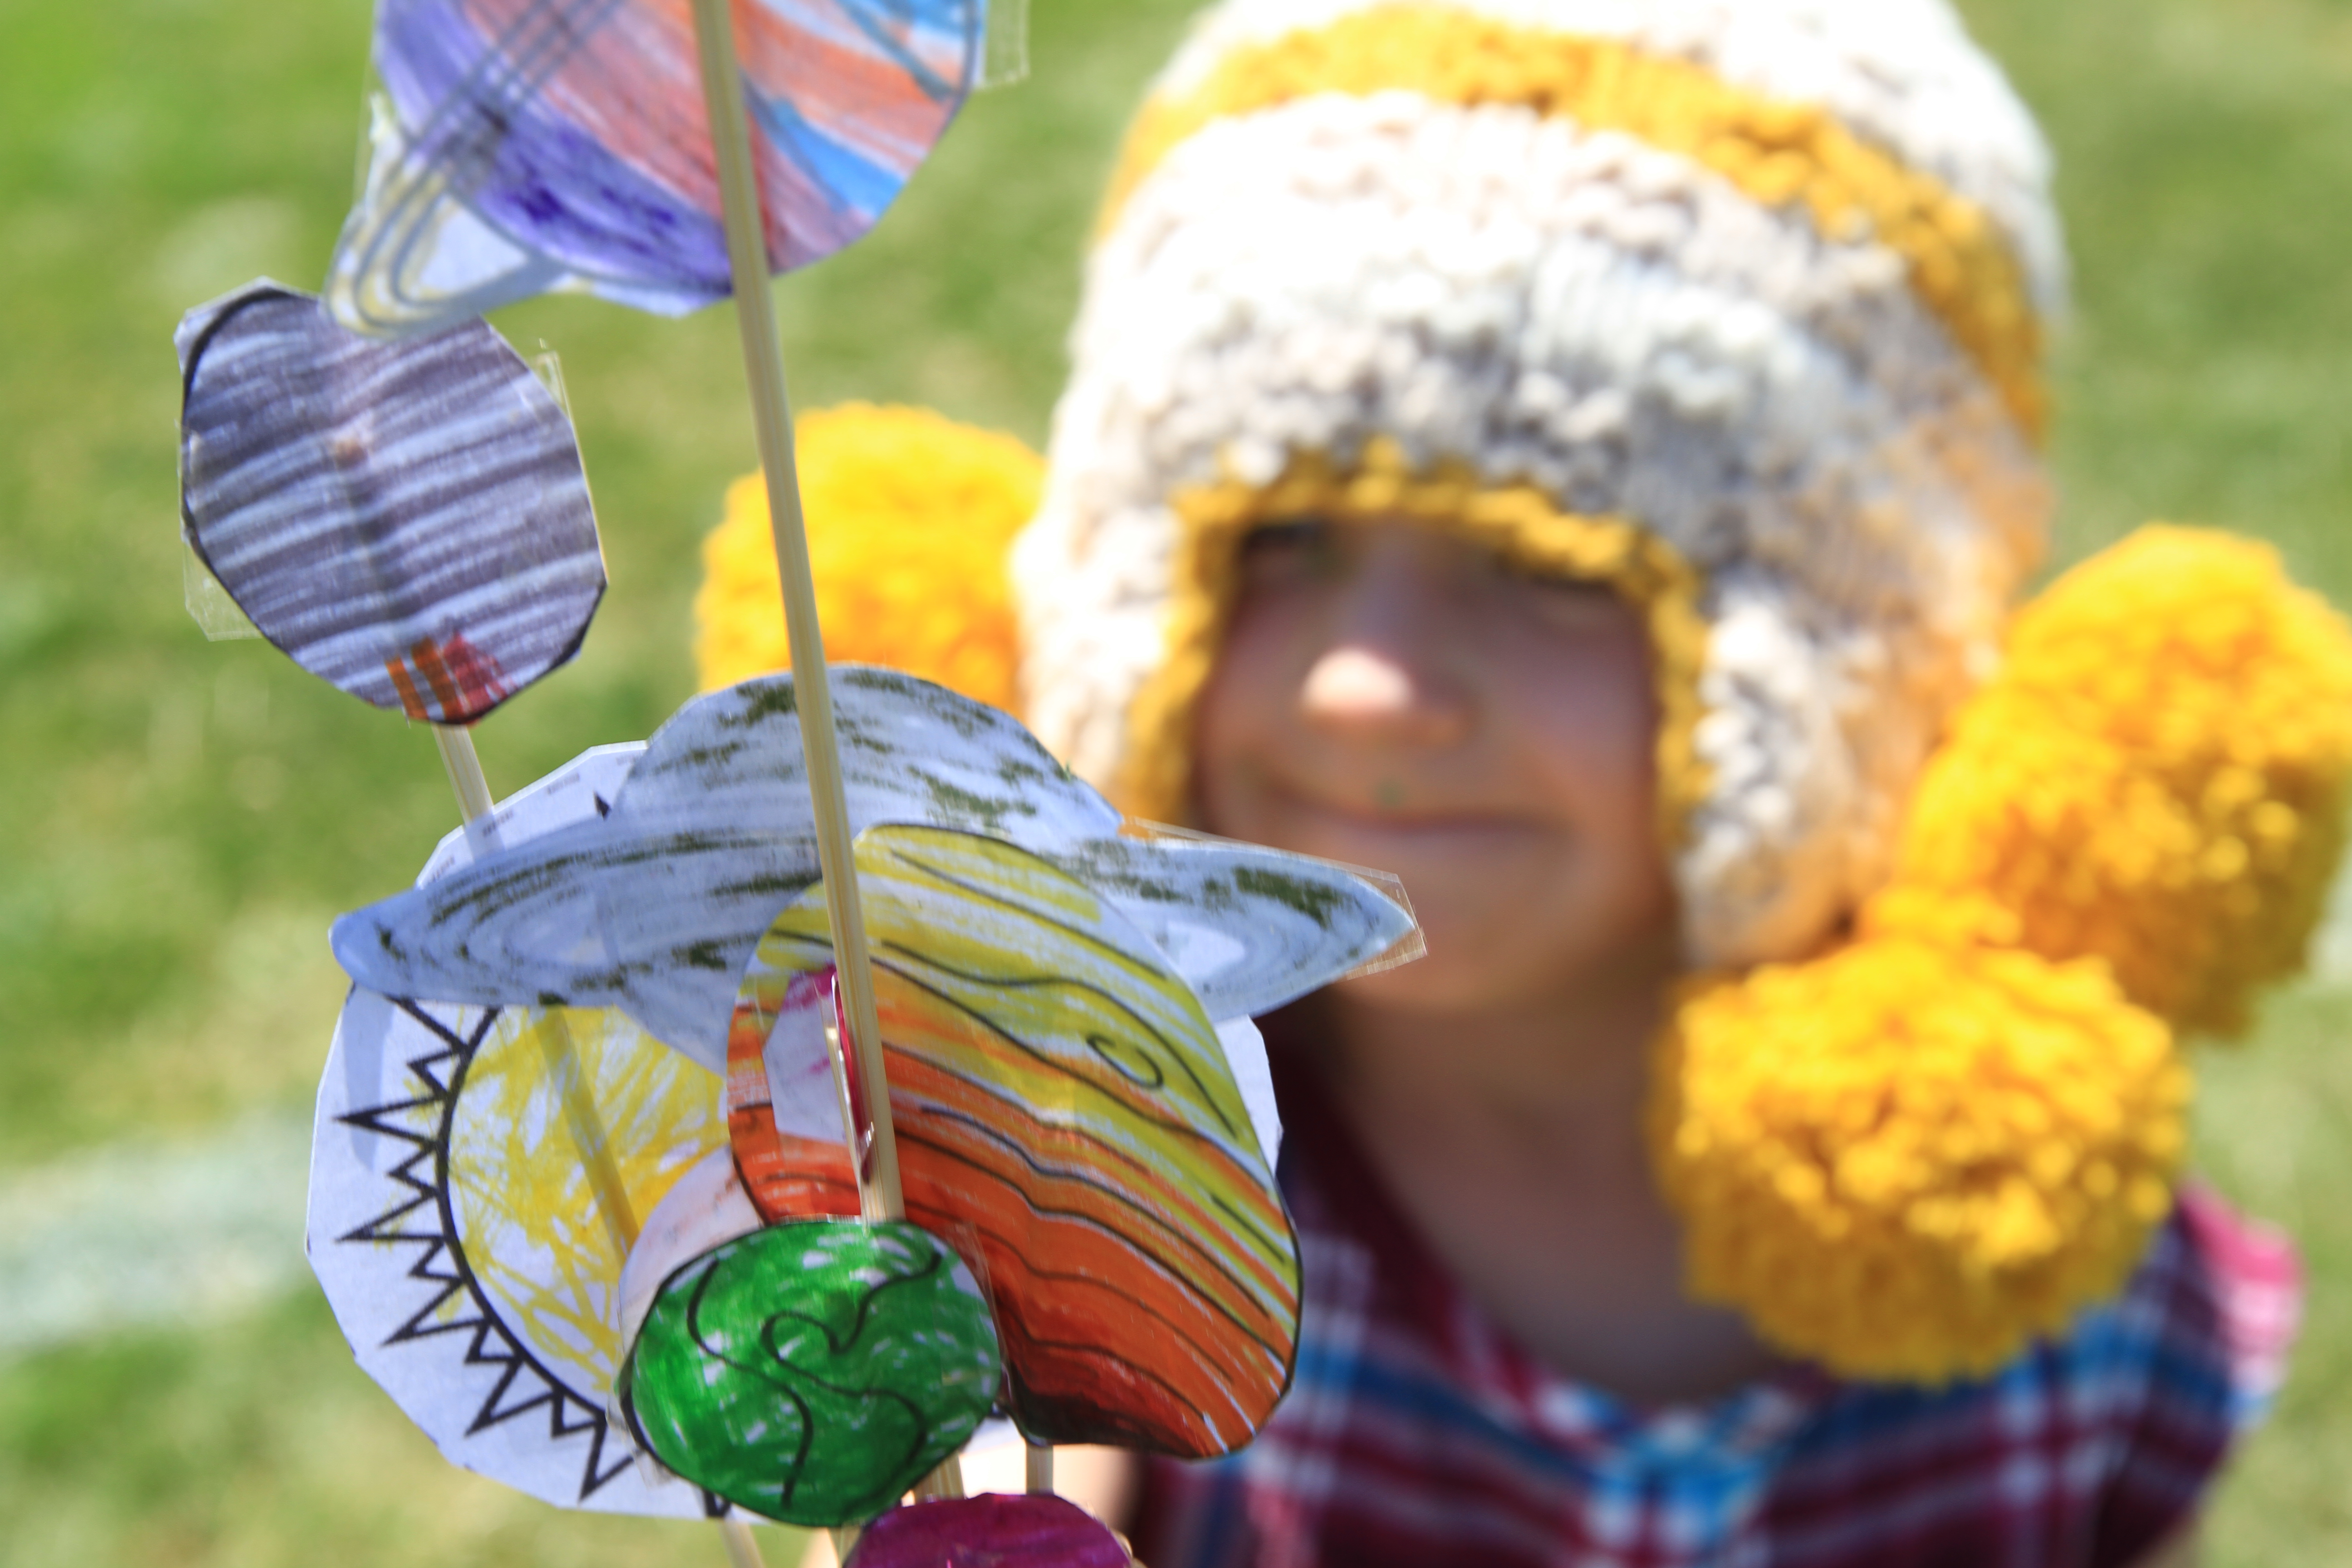
Each time you pace out your planets, place your skewer as a marker. You should end up with a little gathering of planets near your sun, then some so far away that you can barely see them! (Well, 30 large steps away at least!) Before you head out you may like to watch this demonstration that I was delighted to find (after doing ours, but still great to watch!) – he did it on a slightly larger scale but has some great facts about the planets that you might like to include when you are doing it with your young ones. Once all in place have a look at how long it takes to walk around the sun if you were Venus, or perhaps Mars… now how long does it take to you to move around the sun if you were Neptune! (See Neptune (3yo Elka) taking a bit of a shortcut as she orbits the sun (5yo Anica) below) IMG_3052 Depending on your young ones you may like to talk about how our Earth year is determined by a rotation around the sun. (We will be looking at weather a little shortly, so we’ll answer some of those seasons questions in the coming week!) – and make sure you bring your planets home again, they will be useful for our upcoming galaxy play-dough! IMG_3066

EASY ACTIVITIES TO BUILD YOUNG BRAINS: BUILD OUR SOLAR SYSTEM

There are many wonderful ways to represent the solar system but we chose a simple one that will stay with us as a reference point for the rest of the year.

Unless you are a keen stargazer you may want to refresh a few interesting points about the planets before you start. This is a good place to start.

IMG_3036

With research book (or iPad) in hand tell your kids the most interesting things you know about the first planet from the sun. Ask them how best to represent these qualities in their planet and get those paints mixing!

IMG_3039

Repeat this process for each of the planets as you work your way out from the sun. To re-enforce the idea of colour mixing I encouraged the kids to choose at least 2 colours for each planet. (The delight of kids learning red and yellow forms orange never grows old!)

Depending on your kids you may like to mix up your paining technique to ensure each planet is a unique; we started with brushes, moved onto squish painting (where you put dobs of paint, fold the paper and squish to see what happens) and then ended up making hand prints to decorate the last of our planets.

IMG_3027

Once all are dry, cut your planets to scale. I referred to this site, with the diagram below, to get approximate scale, though found that accurate scale was not necessarily practical (I didn’t want to smallest to be the size of a pin head, nor did I want the largest to be the size of an umbrella – we compromised and made them all a little closer in size for practical reasons!)

These planets now decorate our upper walls and we have a small paper rocket (left over from our straw spaceship adventure) that visits a different planet each day, finding facts and reminding us that we are just a tiny part of this huge universe!

IMG_3371

EASY ACTIVITIES TO BUILD YOUNG BRAINS: SPARKLE WRITING.

IMG_2981

Sand writing is a lovely tactile way to learn letter shapes… but sparkle writing is something that is hard not to be excited about starting!

Simply fill a container with glitter (not too thick, you only need a couple of mm deep for the letters to form).

When they want a fresh surface to write on simply shake the container slightly and it will clear the way for more creations.

The 5yo wanted to write words, the 3yo was happy making letters and shapes (all these activities can be supported by showing an example for them to model their own work on)… but by far the most fun was had when the 3yo returned to play on her own; she was consumed for quite some time drawing little pictures by herself. It served not only as a shape recognition and letter forming practice, but also as a quite, meditative time for the kids throughout their day. Quite reflective time (forgive the pun) is essential for processing information, particularly for those with more introvert tendencies, and is as important to learning as the abundance of information and stimulation that we must also provide to their developing minds.

IMG_3023

House tip: We welcome glitter in our world, but I know many sensible people who avoid it because of the excessive cleaning up required after the fact. To my surprise this unmonitored glitter quite area did not spread (like other glitter art experiences do!) and even more astounding was that it lasted an entire week without mess. I believe the heavy container that we put the glitter in helped with this, and because it was seen as something special the kids were happy playing with the magic dust in their own time, and without spreading it!

THINGS TO SEE AND DO: BUILD A GIANT SAND SCULPTURE.

DSCN5918

Summers Bay, sunshine, splashing in the shallows, schools of small fish swimming past our feet, soldier crabs in the sand, and even the guest appearance of a stingray swimming slightly out of reach. We were delighted by the spontaneous S learning that we found at our trip to Sommers Bay (Tasman Peninsula, Tasmania). And while we’re told this is not unusual for this location it’s not something you can usually plan for in an outing. (As much as you’d like to, wildlife just doesn’t run to a predictable booking schedule!)

Sand sculptures on the other hand are something you can create at any beach (or large sand play area). Bring a bucket, spade and an (adult sized) shovel to get digging! The kids (and you!) will be amazed at what you can create in a beach trip.

DSCN5827

First up we chose a location, and the kids told me what to draw as I followed their collective instructions mapping out a big tummy, curly tail, long nose and head on the sand. We then all got our little spades and started to dig a big trench around the shape (piling the sand in the middle of the picture, as you would when making a mote around a sand castle.) Gradually the children tired of digging and got a bit distracted safely splashing in the shallows near us, and generally had a good time in the water. As us adults continued digging (and sharing the few facts we had learnt about seahorses!) the children came back and joined us. By the time we were ready to pat down and sculpt the shape, all the children were involved again. The giant 4m seahorse came together remarkably fast, and then much time was spent as the children decorated it with shells.

DSCN5886

The older children planned and placed and organised themselves on a mission to complete the seahorse (very important work, this seahorse building!) while the younger delighted in sticking shells in the sand.

DSCN5905

Sand play is always a winner for many reasons. It’s the elemental stages of physics, it’s tactile, it’s physical… and when done in a team like this the social development, planning, and problem solving involved is spectacular.

DSCN5895

Plus it’s satisfying. Go build a giant seahorse that will be washed away at the next tide. It’s brilliant.

ONE SIMPLE STRATEGY TO HELP KIDS OVERCOME FEAR.

Each of my children, at a particular point in their lives, have become terrified of spiders. Not caused by any traumatic event, but as though an instinctive ‘fear switch’ for 8-legged creepy crawlies is suddenly turned on. I’ve talked with other parents, and this seems common.

Elka, the 3yo, recently started being scared of spiders. She is fine with all other creatures, but spiders make her squeal.

As luck would have it, when we were looking for S words on our first day we spotted a spider on the wall. Initially seen by her older sister who said ‘SPIDER!’ I replied ‘Yes, SSSSpider SSSStarts with SSSSS too! well done!’ But then she corrected me, there was one on the wall behind me. And this is when the screaming started. Elka climbed on the table and squealed in a pitch that could shatter windows!

I trapped it under a glass, and showed it to her. It was a little one (locally known as a ‘daddy long legs’ because of it’s ridiculously long legs in relation to it’s tiny body). I asked Elka to count the legs, to think about how the spider was feeling trapped in the glass with all us big people looking at it. To look at it’s funny knee joints. She instantly relaxed and started using the logical part of her brain to think about the spider, rather than the instinctive part of her brain to react to the spider.

Before long she was drawing the spider, squinting to get a closer look at it’s eyes, and very happy for me to “let him go in the garden so he wouldn’t be scared any more!”

SPIDER

This is a technique I have read about and trialed a number of times for various situations. In this instance the conditions were right for Elka to face her fear and very quickly overcome it. It may not have been so successful if she hadn’t been as receptive (ie tired or hungry etc) but for now Elka is far more sympathetic towards spiders than she is scared of them.

If only all the problems of the world were this easy to solve!

IMG_8117

Update: This last image was taken recently at SIngapore Zoo and and I thought I should add it to show how Elka’s new found curiosity for our 8 legged friends has truly taken over any fear that we dealt with all those weeks ago, putting in the effort to deal with the situation as we did seems to have paid off in this case!

EASY ACTIVITIES TO BUILD YOUNG BRAINS: MAKE SIMPLE BUTTON CASTANETS.

Simple button castanets are a delightfully easy way to bring a little spanish culture into your home.

spain2b

Ask your tot to choose 2 large buttons.

Give them some elastic to thread through the holes.

Tie off the back of the elastic and attach to fingers.

This takes just a few moments, then they’ll want to make a set for the other hand!

We then held a little dance performance where each child showed us their moves. What we intended as a simple fine motor skills activity with some cultural background (making the castanets) turned into a full body improvisation of spanish dance and the kids couldn’t have loved it more! (Even Anica, who typically shys away from any performance, allowed her whole body to become a proud spanish dancer – see her take the stage with gusto below!)

spain2c

Allowing children to act (and excell) out of their usual comfort zone allows those parts of the brain that are rarely accessed to get more of a look in and build stronger connections for other areas of their life. What triggers this will be different for each child, just as will the skills that are outside their comfort zone! Anica in this instance showed all the traits of a percussive, passionate, extravert in her Spanish solo – where as previously she has told me she is the best at ‘staying in the middle and not being seen’! Anica is likely to always be a little more shy than her outgoing sister, and we don’t want to change this about her, but the more she has the opportunity to choose to venture outside her comfort zone, the more she will be able to function with her whole brain in day to day life.

Without getting carried away talking about the plasticity of the brain, this applies to a variety of what we deem to be inbuilt ‘personality traits’ – Our brain changes to physically become stronger at what we are told we are and what we are allowed to do. As parents, carers and educators we have a huge responsibility to the young ones around us to explore all the possibilities of who they could be, rather than predict or label their personality and limit their ability to grow into the well rounded adults we all want to see in our future!

As an ex-dance teacher I was also delighted to see how this simple prop changed the way the children moved from a technical movement point of view. Having watched a video as part of our research last week (that showed some spanish dancing) the children instantly changed their default flowing movement (influenced by their friends mimicking ballet) into a staccato passionate movement that they had seen in the flamenco dance. Their feet stomped, their arms held power and their little castanets went wild!

THINGS TO SEE AND DO: TRY SPANISH SWEETS WITH YOUR KIDS.

I’ve talked before about my mission to cook food from every country around the globe with my kids, so with Spain as our feature country how could I resist a bit of Spanish cuisine. Paella is perhaps the most famous dish that is surprisingly easy to cook (a rice dish that comes in many variations to suit almost every taste), but alas – once made, it was not a favourite with my own children.

Spanishfood1

Churros however, is a chocolate dipped treat that no child could resist. We had plans of cooking this but then stumbled upon it on the tapes menu at a lovely little coffee shop. We enjoyed ours very much, if you would like to make it yourself then here is the recipe (tried and tested by a friend and her children as a great success) or if you’re in Hobart and want an excuse to get out then Rain Check Lounge in North Hobart currently have it on their menu – invite a few friends and make a afternoon of it!

S – IS FOR STRAW SPACESHIP

space3b

The delight of flight. A small engineering experiment using air pressure to launch your spaceship into the stratosphere!

  • Cut a pair of matching paper sides for your space craft.
  • Glue a toothpick between the 2 sides (taking care that to leave a pocket for the straw to be inserted later – as shown in the image below).
  • Let the glue dry and decorate your space craft.space1

Now for the launch!

  • Take the spaceship and place it on a bent straw (toothpick in straw, paper on outside of straw)
  • Count down 10 – 9 – 8 – 7 – 6 – 5 – 4 – 3 – 2 – 1…. BLAST OFF!
  • Take a deep breath and launch with a short sharp blow!

Watch as the children shrill with excitement, and dash to make some more. My own offspring wanted to see what shapes would fly best (circle spaceships, square ones etc.) we then measured the flight height against a wall (building on an understanding of numeracy as well as introducing the idea of a controlled test.)

For those more ready for a true investigation into air pressure try different sized straws and see how that effects the air pressure.

S – IS FOR SPAIN

Holla, for our first country we’re heading to Europe to visit sunny Spain!

To start our journey we found the shape of Spain, then located it on our world map and drew the country outline on our information board. I was impressed that even the 3yo took great care to shape her country, and while she still draws very basic repeated shapes for human figures, her abstract shape recognition (for the shape of the country) was rather close to the image she was copying. This is a great mental mapping and fine motor exercise, the more they use the skills, the more it will translate to other areas of their learning.

We then found some facts about Spain. With a goal throughout this process to show my kids different ways of finding information, this time we watched a short educational video for kids. Despite the narrative and visual quality of the film being slightly cringe worthy for me, the blandly presented content really impacted the kids. They went on to create a book about Spain, each page detailing something that they particularly remembered about the country. Sleeping in the day while the shops are closed, playing soccer, and dressing up to dance were a big hit.

spain1

We also played Soccer in the sun, made castanets, danced to Spanish music and ate Spanish food. I’ll write about these in future posts, but for now put Spain on the map and go on a fact finding mission to see what your children learn.

Find your free vector map of spain here.